Train your ControlNet with diffusers 🧨
Introduction
ControlNet is a neural network structure that allows fine-grained control of diffusion models by adding extra conditions. The technique debuted with the paper Adding Conditional Control to Text-to-Image Diffusion Models, and quickly took over the open-source diffusion community author's release of 8 different conditions to control Stable Diffusion v1-5, including pose estimations, depth maps, canny edges, sketches, and more.
In this blog post we will go over each step in detail on how we trained the Uncanny Faces model - a model on face poses based on 3D synthetic faces (the uncanny faces was an unintended consequence actually, stay tuned to see how it came through).
Getting started with training your ControlNet for Stable Diffusion
Training your own ControlNet requires 3 steps:
Planning your condition: ControlNet is flexible enough to tame Stable Diffusion towards many tasks. The pre-trained models showcase a wide-range of conditions, and the community has built others, such as conditioning on pixelated color palettes.
Building your dataset: Once a condition is decided, it is time to build your dataset. For that, you can either construct a dataset from scratch, or use a sub-set of an existing dataset. You need three columns on your dataset to train the model: a ground truth
image, aconditioning_imageand aprompt.Training the model: Once your dataset is ready, it is time to train the model. This is the easiest part thanks to the diffusers training script. You'll need a GPU with at least 8GB of VRAM.
1. Planning your condition
To plan your condition, it is useful to think of two questions:
- What kind of conditioning do I want to use?
- Is there an already existing model that can convert 'regular' images into my condition?
For our example, we thought about using a facial landmarks conditioning. Our reasoning was: 1. the general landmarks conditioned ControlNet works well. 2. Facial landmarks are a widespread enough technique, and there are multiple models that calculate facial landmarks on regular pictures 3. Could be fun to tame Stable Diffusion to follow a certain facial landmark or imitate your own facial expression.
2. Building your dataset
Okay! So we decided to do a facial landmarks Stable Diffusion conditioning. So, to prepare the dataset we need:
- The ground truth
image: in this case, images of faces - The
conditioning_image: in this case, images where the facial landmarks are visualised - The
caption: a caption that describes the images being used
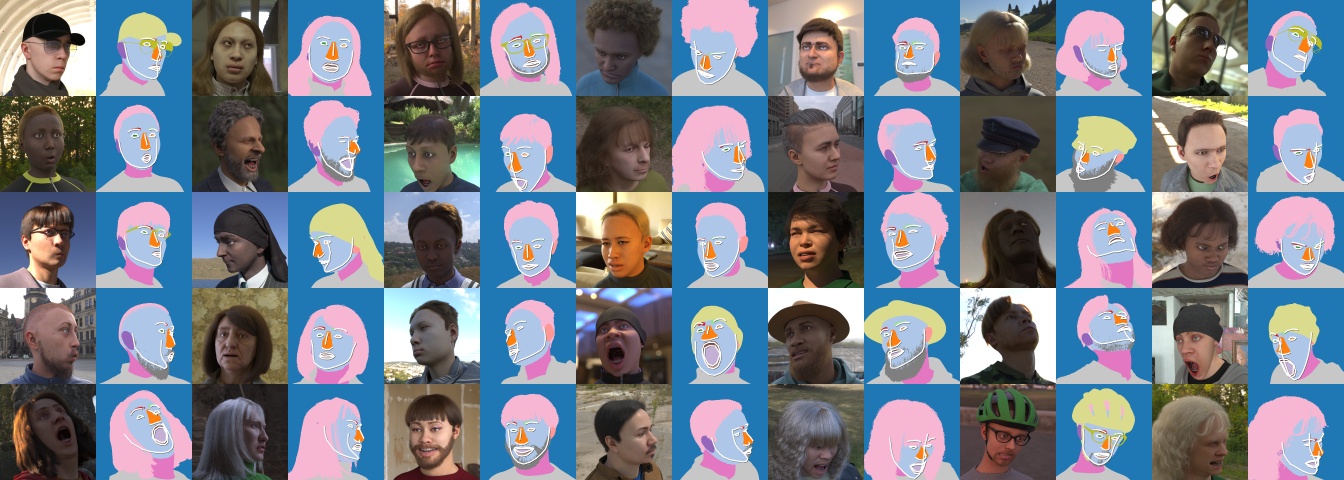
For this project, we decided to go with the FaceSynthetics dataset by Microsoft: it is a dataset that contains 100K synthetic faces. Other face research datasets with real faces such as Celeb-A HQ, FFHQ - but we decided to go with synthetic faces for this project.
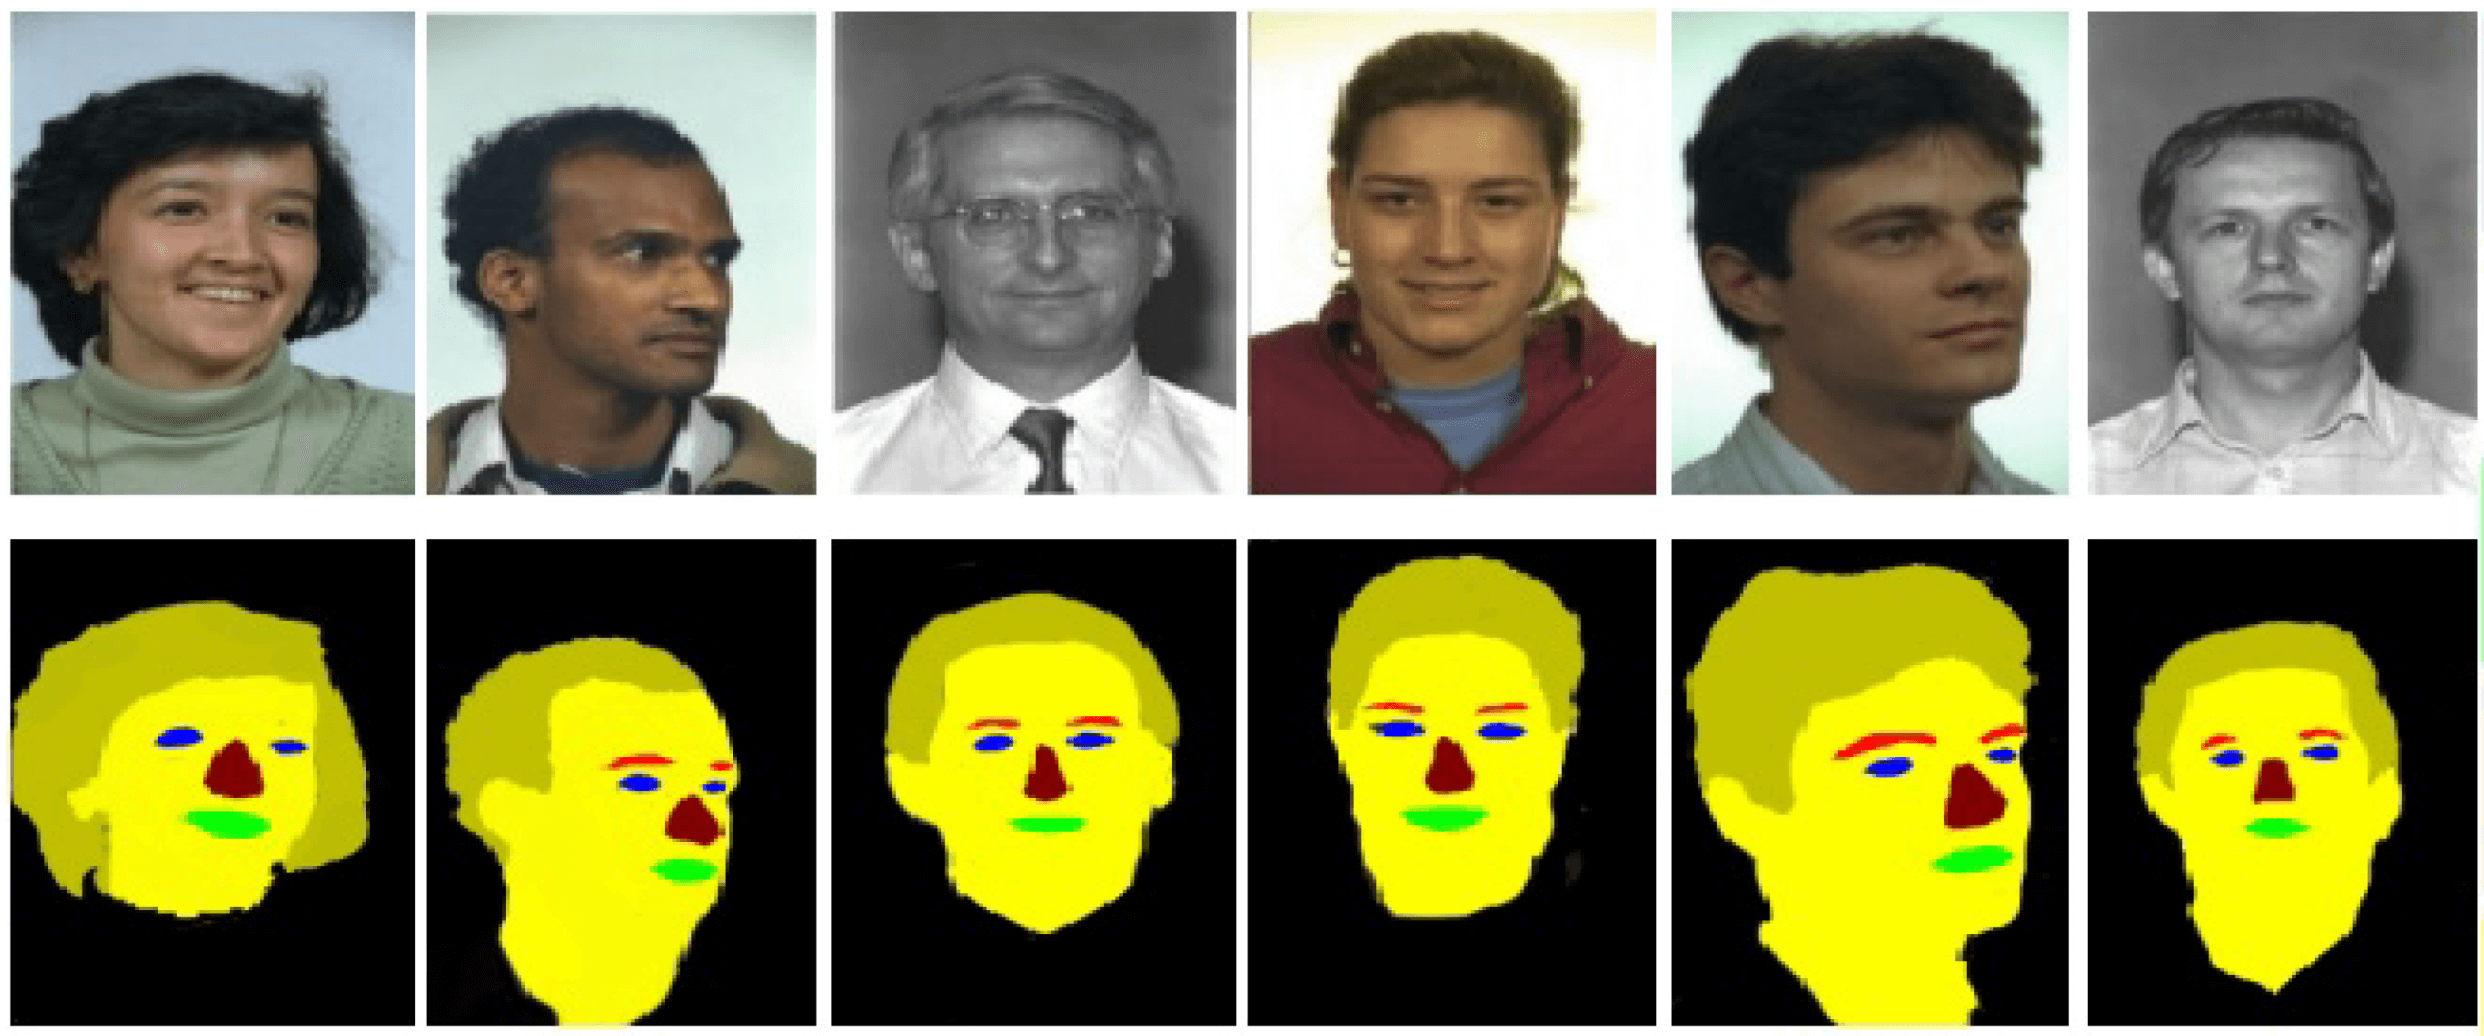
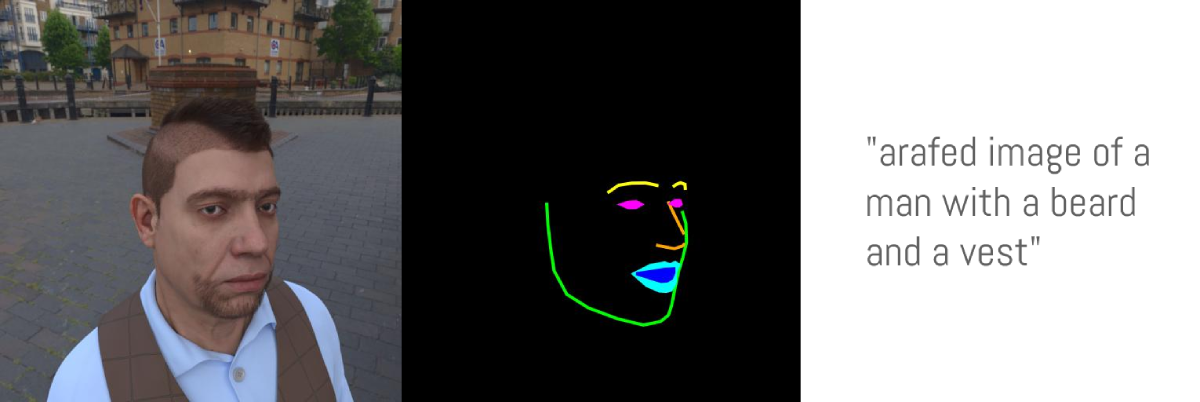
The FaceSynthetics dataset sounded like a great start: it contains ground truth images of faces, and facial landmarks annotated in the iBUG 68-facial landmarks format, and a segmented image of the face.
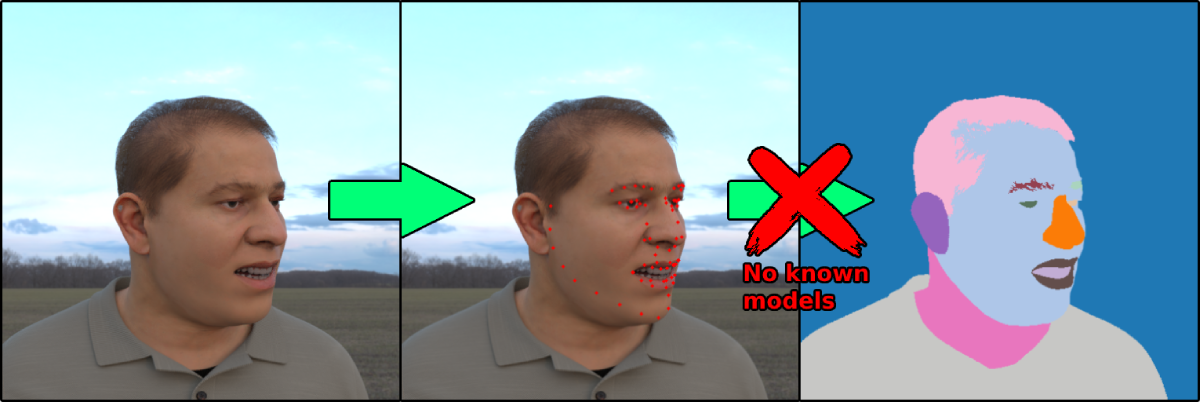
Perfect. Right? Unfortunately, not really. Remember the second question in the "planning your condition" step - that we should have models that convert regular images to the conditioning? Turns out there is no known model that can turn faces into the annotated landmark format of this dataset.
So we decided to follow another path:
- Use the ground truths
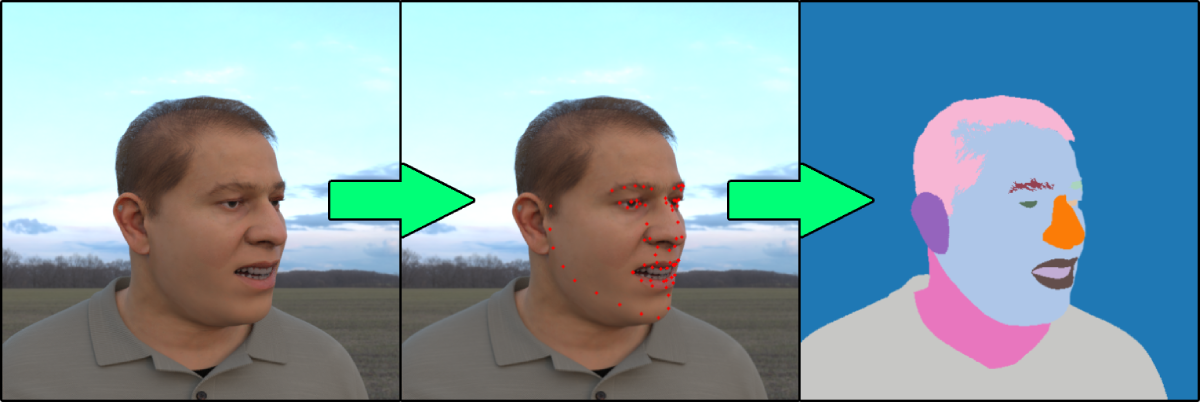
imageof faces of theFaceSyntheticsdataset - Use a known model that can convert any image of a face into the 68-facial landmarks format of iBUG (in our case we used the SOTA model SPIGA)
- Use custom code that converts the facial landmarks into a nice illustrated mask to be used as the
conditioning_image - Save that as a Hugging Face Dataset
Here you can find the code used to convert the ground truth images from the FaceSynthetics dataset into the illustrated mask and save it as a Hugging Face Dataset.
Now, with the ground truth image and the conditioning_image on the dataset, we are missing one step: a caption for each image. This step is highly recommended, but you can experiment with empty prompts and report back on your results. As we did not have captions for the FaceSynthetics dataset, we ran it through a BLIP captioning. You can check the code used for captioning all images here
With that, we arrived to our final dataset! The Face Synthetics SPIGA with captions contains a ground truth image, segmentation and a caption for the 100K images of the FaceSynthetics dataset. We are ready to train the model!
3. Training the model
With our dataset ready, it is time to train the model! Even though this was supposed to be the hardest part of the process, with the diffusers training script, it turned out to be the easiest. We used a single A100 rented for US$1.10/h on LambdaLabs.
Our training experience
We trained the model for 3 epochs (this means that the batch of 100K images were shown to the model 3 times) and a batch size of 4 (each step shows 4 images to the model). This turned out to be excessive and overfit (so it forgot concepts that diverge a bit of a real face, so for example "shrek" or "a cat" in the prompt would not make a shrek or a cat but rather a person, and also started to ignore styles).
With just 1 epoch (so after the model "saw" 100K images), it already converged to following the poses and not overfit. So it worked, but... as we used the face synthetics dataset, the model ended up learning uncanny 3D-looking faces, instead of realistic faces. This makes sense given that we used a synthetic face dataset as opposed to real ones, and can be used for fun/memetic purposes. Here is the uncannyfaces_25K model.
In this interactive table you can play with the dial below to go over how many training steps the model went through and how it affects the training process. At around 15K steps, it already started learning the poses. And it matured around 25K steps. Here
How did we do the training
All we had to do was, install the dependencies:
pip install git+https://github.com/huggingface/diffusers.git transformers accelerate xformers==0.0.16 wandb
huggingface-cli login
wandb login
And then run the train_controlnet.py code
!accelerate launch train_controlnet.py \
 --pretrained_model_name_or_path="stabilityai/stable-diffusion-2-1-base" \
 --output_dir="model_out" \
 --dataset_name=multimodalart/facesyntheticsspigacaptioned \
 --conditioning_image_column=spiga_seg \
 --image_column=image \
 --caption_column=image_caption \
 --resolution=512 \
 --learning_rate=1e-5 \
 --validation_image "./face_landmarks1.jpeg" "./face_landmarks2.jpeg" "./face_landmarks3.jpeg" \
 --validation_prompt "High-quality close-up dslr photo of man wearing a hat with trees in the background" "Girl smiling, professional dslr photograph, dark background, studio lights, high quality" "Portrait of a clown face, oil on canvas, bittersweet expression" \
 --train_batch_size=4 \
 --num_train_epochs=3 \
 --tracker_project_name="controlnet" \
 --enable_xformers_memory_efficient_attention \
 --checkpointing_steps=5000 \
 --validation_steps=5000 \
 --report_to wandb \
 --push_to_hub
Let's break down some of the settings, and also let's go over some optimisation tips for going as low as 8GB of VRAM for training.
pretrained_model_name_or_path: The Stable Diffusion base model you would like to use (we chose v2-1 here as it can render faces better)output_dir: The directory you would like your model to be saveddataset_name: The dataset that will be used for training. In our case Face Synthetics SPIGA with captionsconditioning_image_column: The name of the column in your dataset that contains the conditioning image (in our casespiga_seg)image_column: The name of the colunn in your dataset that contains the ground truth image (in our caseimage)caption_column: The name of the column in your dataset that contains the caption of that image (in our caseimage_caption)resolution: The resolution of both the conditioning and ground truth images (in our case512x512)learning_rate: The learing rate. We found out that1e-5worked well for these examples, but you may experiment with different values ranging between1e-4and2e-6, for example.validation_image: This is for you to take a sneak peak during training! The validation images will be ran for every amount ofvalidation_stepsso you can see how your training is going. Insert here a local path to an arbitrary number of conditioning imagesvalidation_prompt: A prompt to be ran togehter with your validation image. Can be anything that can test if your model is training welltrain_batch_size: This is the size of the training batch to fit the GPU. We can afford4due to having an A100, but if you have a GPU with lower VRAM we recommend bringing this value down to1.num_train_epochs: Each epoch corresponds to how many times the images in the training set will be "seen" by the model. We experimented with 3 epochs, but turns out the best results required just a bit more than 1 epoch, with 3 epochs our model overfit.checkpointing_steps: Save an intermediary checkpoint everyxsteps (in our case5000). Every 5000 steps, an intermediary checkpoint was saved.validation_steps: Everyxsteps thevalidaton_promptand thevalidation_imageare ran.report_to: where to report your training to. Here we used Weights and Biases, which gave us this nice report. But reducing thetrain_batch_sizefrom4to1may not be enough for the training to fit a small GPU, here are some additional parameters to add for each GPU VRAM size:push_to_hub: a parameter to push the final trained model to the Hugging Face Hub.
Fitting on a 16GB VRAM GPU
pip install bitsandbytes

--train_batch_size=1 \
--gradient_accumulation_steps=4 \
--gradient_checkpointing \
--use_8bit_adam
The combination of a batch size of 1 with 4 gradient accumulation steps is equivalent to using the original batch size of 4 we used in our example. In addition, we enabled gradient checkpointing and 8-bit Adam for additional memory savings.
Fitting on a 12GB VRAM GPU
--gradient_accumulation_steps=4 \
--gradient_checkpointing \
--use_8bit_adam
--set_grads_to_none
Fitting on a 8GB VRAM GPU
Please follow our guide here
4. Conclusion!
This experience of training a ControlNet was a lot of fun. We successfully trained a model that can follow real face poses - however it learned to make uncanny 3D faces instead of real 3D faces because this was the dataset it was trained on, which has its own charm and flare.
Try out our Hugging Face Space:
As for next steps for us - in order to create realistically looking faces, while still not using a real face dataset, one idea is running the entire FaceSynthetics dataset through Stable Diffusion Image2Imaage, converting the 3D-looking faces into realistically looking ones, and then training another ControlNet.
And stay tuned, as we will have a ControlNet Training event soon! Follow Hugging Face on Twitter or join our Discord to stay up to date on that.

